Annotation tool
The annotation tool is the primary interface for labeling robotic rollout episodes as successes or failures. An operator reviews video footage from one or more cameras and answers a structured questionnaire. Annotations are embedded back into the HDF5 episode file.
Launching the tool
Standalone (Web UI)
The simplest way to annotate a batch of pre-recorded episodes:
python -m oopsie_tools.annotation_tool.annotator_server \
    --samples-dir <DIR> --port <PORT> --annotator-name <YOUR_NAME>
samples_dir should be the top level directory where your samples were recorded, port specifies on which port the webserver can be accessed (navigate to localhost:<port> to see the web interface) and annotator_name records who provided the annotation. Open http://localhost:<PORT> in a browser. The tool scans samples-dir for HDF5 files and MP4 videos, and presents them one at a time for annotation.
In-the-loop (Web UI)
For instructions on launching the web tool for in-the-loop annotation, see our data collection instructions.
Web UI
Overview
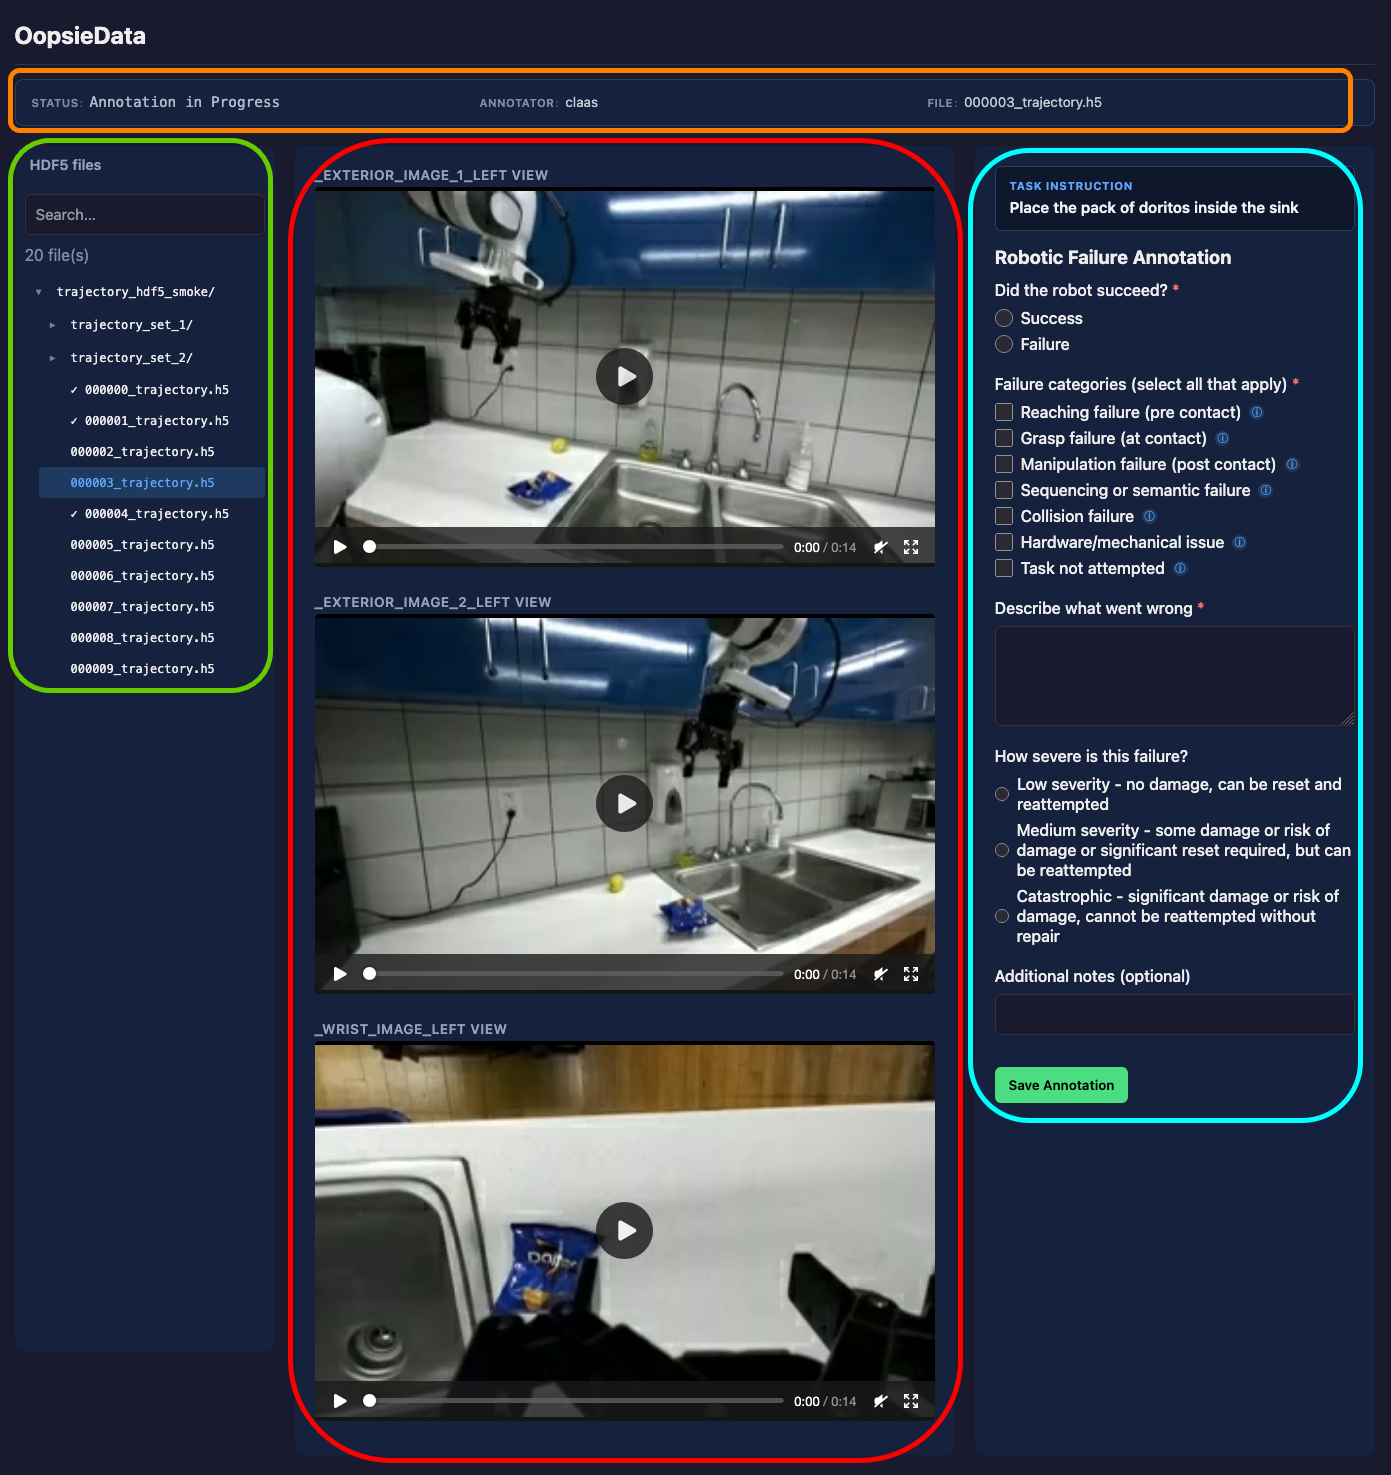
The main view has the following components:
- (1) Video Panel: Video playback controls
- (2) Navigation Panel: Controls for navigating between episodes
- (3) Annotation Panel: Annotation questionnaire
- (4) Info Panel: Information on the current trajectory
(1) Video Panel
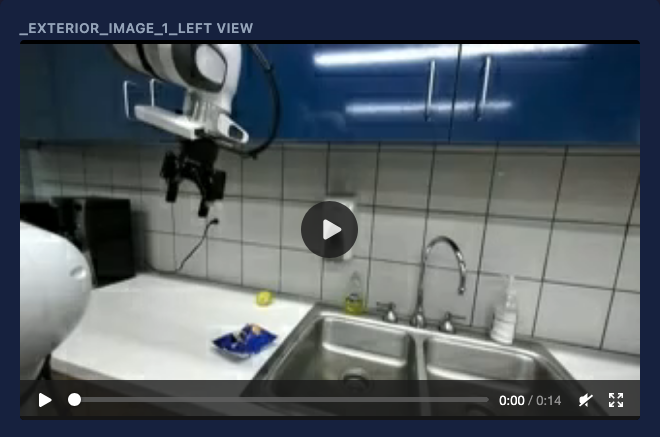
The video panel displays MP4 footage from all cameras recorded during the episode. Use the playback controls to review the rollout before annotating.
(2) Navigation Panel
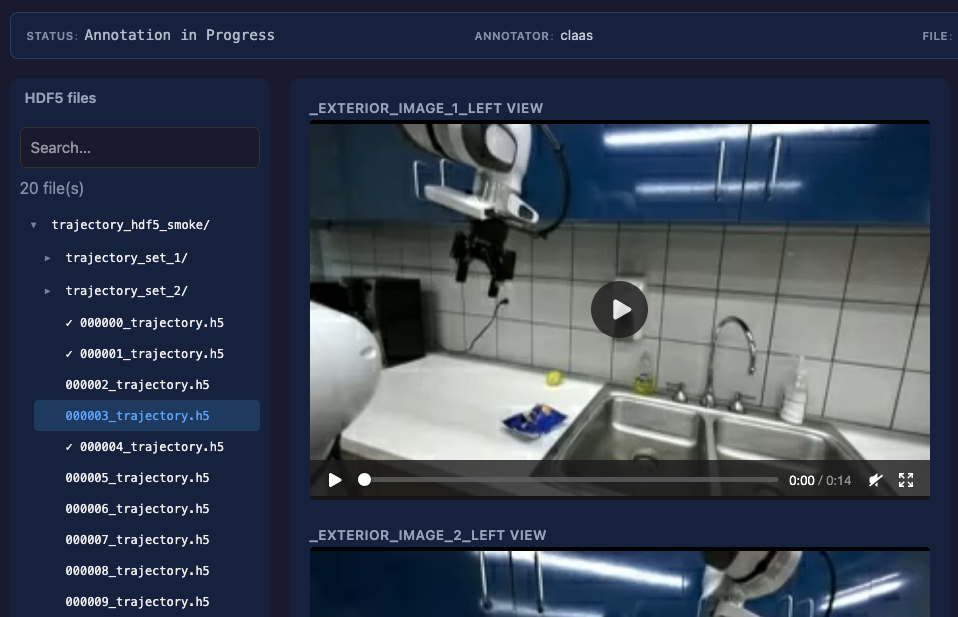
The navigation panels allows for navigation between different episodes. The files are arranged according to the directory structure of your samples directory. If you are using the data recording tools, they are arranged by session.
Each fully annotated episode is marked with a small ✓ .
(3) Annotation Panel
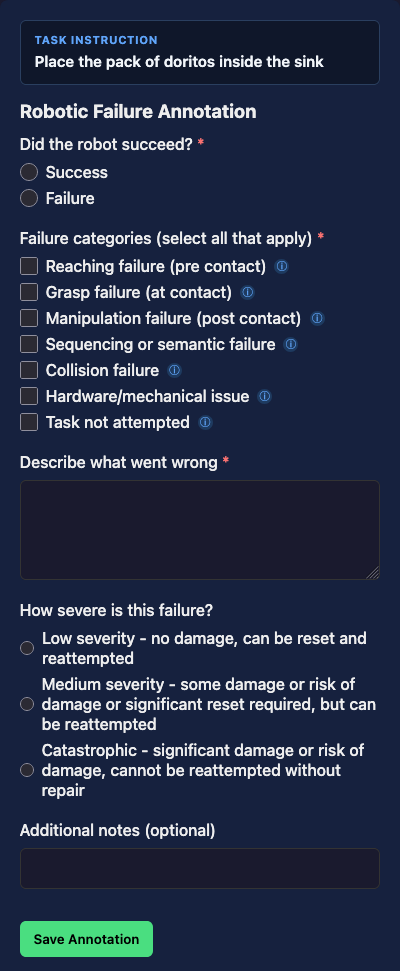
After reviewing the video, use the annotation panel to fill out the annotation questionnaire.
To display instructions and definitions for the failure categories, you can hover over the small question mark beside each category.
Please select all failures that appear during a trajectory. For example, if the robot fails to grasp an object, and knocks another object over, it would be appropriate to select both “Grasp failure” and “Collision failure”. Sometimes it might also be ambiguous if a failed grasp should be classified as e.g. a reaching or a grasping failure. In these cases, please again mark all categories that could reasonably apply. Part of our project goal is to obtain data on inter-annotator disagreement on robotic failures, so we expect some variation and disagreement between different annotators.
Questions
| Question | Type | Required | Notes |
|---|---|---|---|
| Did the robot succeed? | Radio | Yes | Success or Failure |
| Failure categories | Checkbox | Yes (on failure) | Select all that apply — skipped on success |
| Describe what went wrong | Text area | Yes (on failure) | Free-text description — skipped on success |
| How severe is this failure? | Radio | No | Three severity levels |
| Additional notes | Text | No | Free-form field for any extra context |
Failure categories
The failure taxonomy distinguishes where in the manipulation pipeline the breakdown occurred:
| Category | Meaning |
|---|---|
| Reaching failure (pre-contact) | Robot fails to reach the target; no contact is made. If a grasp barely misses, classify as grasp failure instead. |
| Grasp failure (at contact) | Robot makes contact but fails to grasp correctly — slips, drops, or grasps incorrectly. |
| Manipulation failure (post-contact) | Robot grasps successfully but fails during subsequent manipulation (e.g. grasps a door handle but cannot open the door). |
| Sequencing or semantic failure | Wrong action or wrong object — executing a related but incorrect action such as picking the wrong item. |
| Collision failure | Failure due to collision with the environment or an obstacle. Can co-occur with other categories. |
| Hardware/mechanical issue | Failure caused by robot hardware rather than the policy. |
| Task not attempted | Robot makes no discernible attempt — use for stalling episodes. |
Multiple categories can be selected simultaneously.
Severity
For failures, an optional severity rating helps downstream filtering:
- Low — no damage, can be immediately reset and reattempted
- Medium — some damage or significant reset required, but reattemptable
- Catastrophic — significant damage or risk; cannot be reattempted without repair
In-the-loop annotation
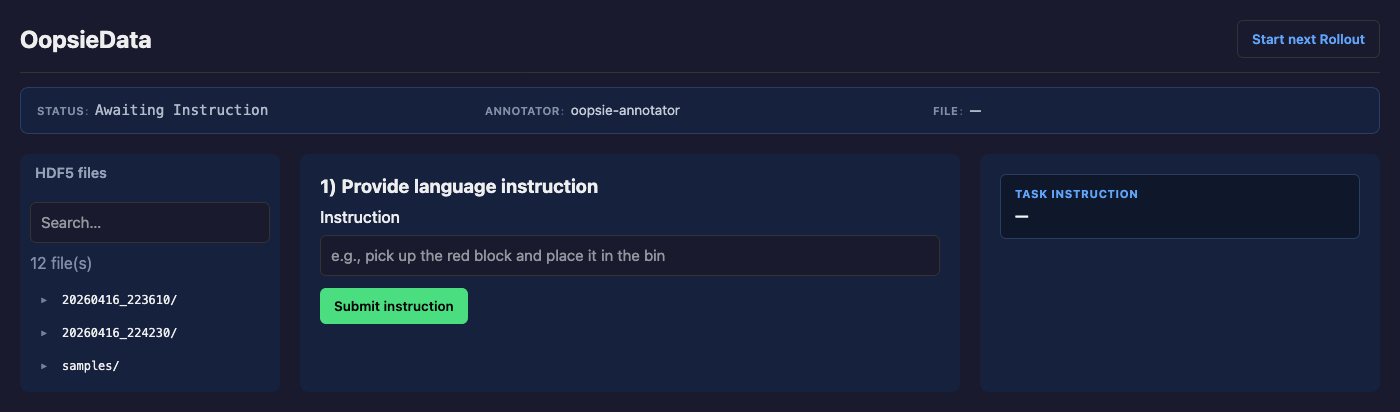
If the rollout annotator is started in-the-loop during robot execution as described in the data collection instructions, an additional page is displayed before annotation. This page allows a user to input a natural language instruction for the task easily. After submitting the instructions, the page will display a waiting annotation while the robot is operating, and return to the annotation overview page after the rollout is finished.
A new rollout will be automatically started after submitting the annotation, or by clicking the “Start new Rollout” button in the top right corner of the screen.
Data output
After each annotated rollout, the annotations are saved back in the original HDF5 file for each episode.